
Project | Pomander
I'm excited to report that some happy newlyweds have been created. I was asked to help out with some flowers for the wedding, and want to share one of my projects with you. To help decorate the festivities, or more specifically, the bridesmaids, I made two pomander balls.
I've made pomander balls before. Usually with premade netted floral foam bases which make things a real breeze. But with a, shall I say, miscommunication during the ordering process, said premade bases were not available come creation time. Well, let's just say I used this as an opportunity to construct some bases from sort of scratch. Luckily I had some floral foam spheres lying around from a previous wedding. All I needed was some netting and tape. I had the tape. I found the netting at a garden store. SO, if you too find yourself in a pomander bind without a premade netted base, check the following:
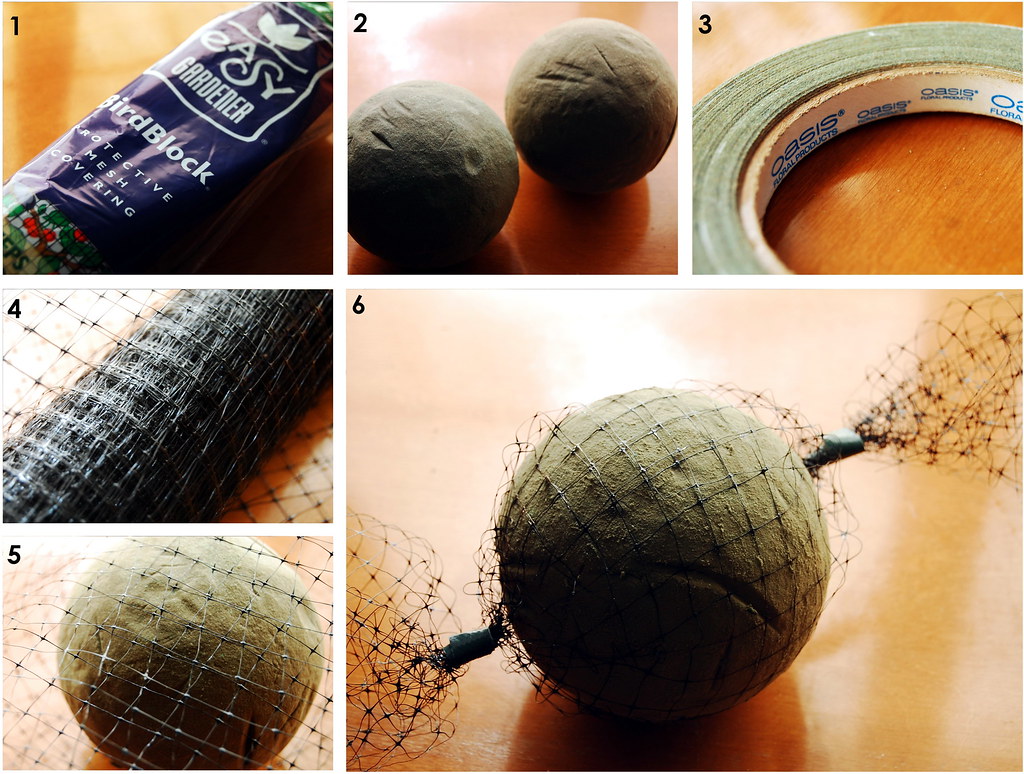
1. Bird Block netting. 2. Floral foam spheres. 3. Oasis waterproof tape. 4. Lay the ball over the netting. Cut a square of netting which should just fit around the ball. 5. Wrap the netting around the ball. Try not to double layer as this will make it difficult to push the stems through. 6. Twist the outer edges and wrap with tape to secure the netting. Clip off the extra netting that extends beyond the tape.
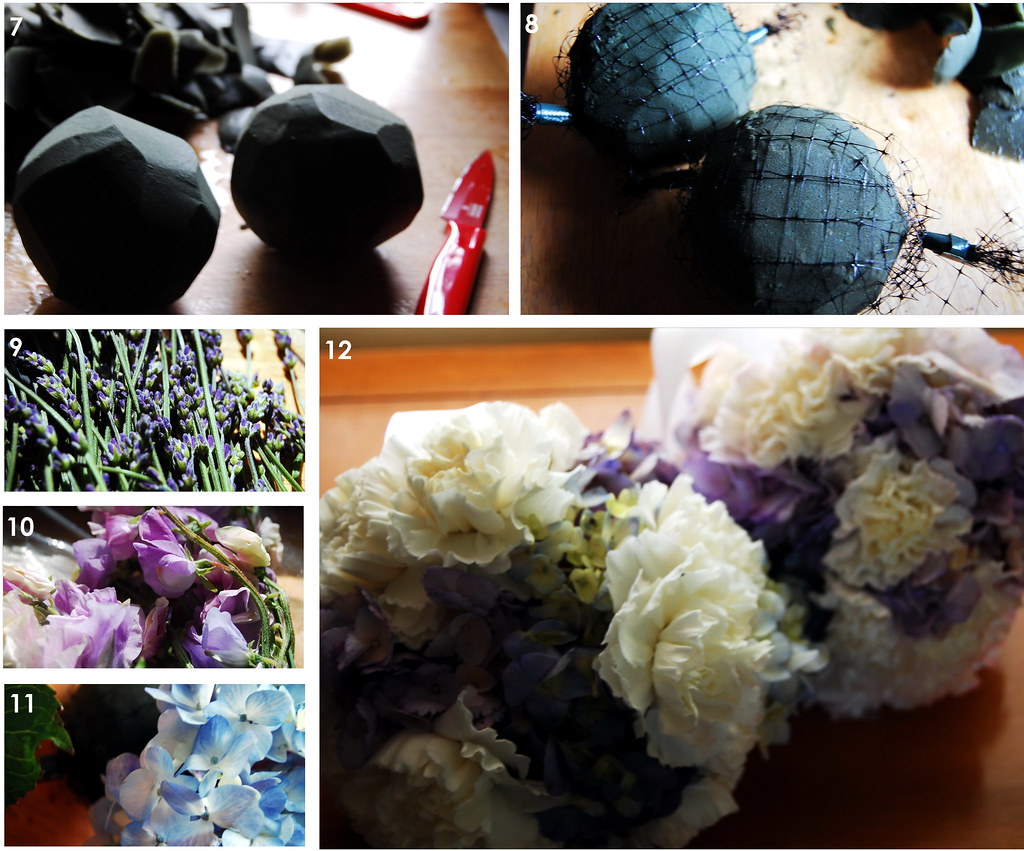
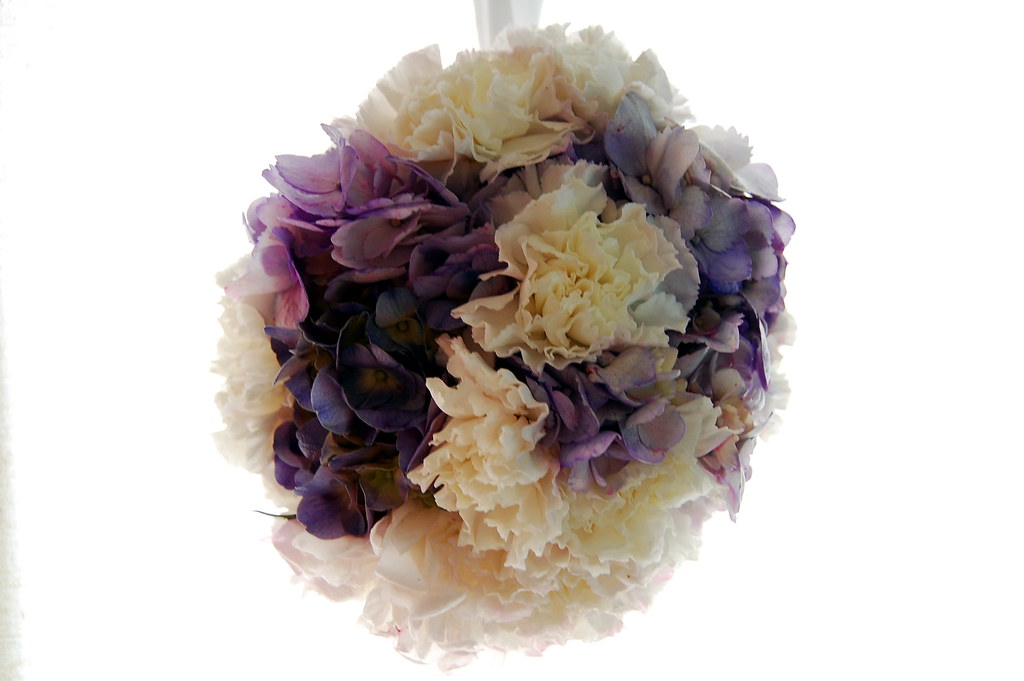
7. Once I had made the bases, I filled the bathtub with a bit of water. I placed the spheres on the surface of the water. Never push floral foam under the water. It has little channels inside that will suck up the water. Pushing them under usually leads to dry centers which you won't know about unless you cut into them. You'll know when they're ready, they'll be heavy and darker in color. I started sticking in some stems, and quickly realized the pomanders were going to be GIGANTIC. My spheres were too large (about the size of a soft ball). This size may have worked with different flowers, but I was using hydrangea which can't be clipped close to the blossom. So, as you can see, I undid the netting and sheared down the foam. 8. I re-wrapped the netting then started again. Tip! Use a bbq skewer to do a little pre tunneling. Often times the stems will bend or break if they are doing the initial piercing. 9. Lavender (which I didn't use much of). 10. Sweet pea. 11. Hydrangea (I also used carnations which are incredible for pomanders). 12. Pomanders!
Once finished, I cut some satin ribbon. I found one of the places the tape came together in the netting and laced the ribbon through, tying it off to create a loop for the bridesmaids to carry them with. Voila! Here she is in action, along with the bride's bouquet:
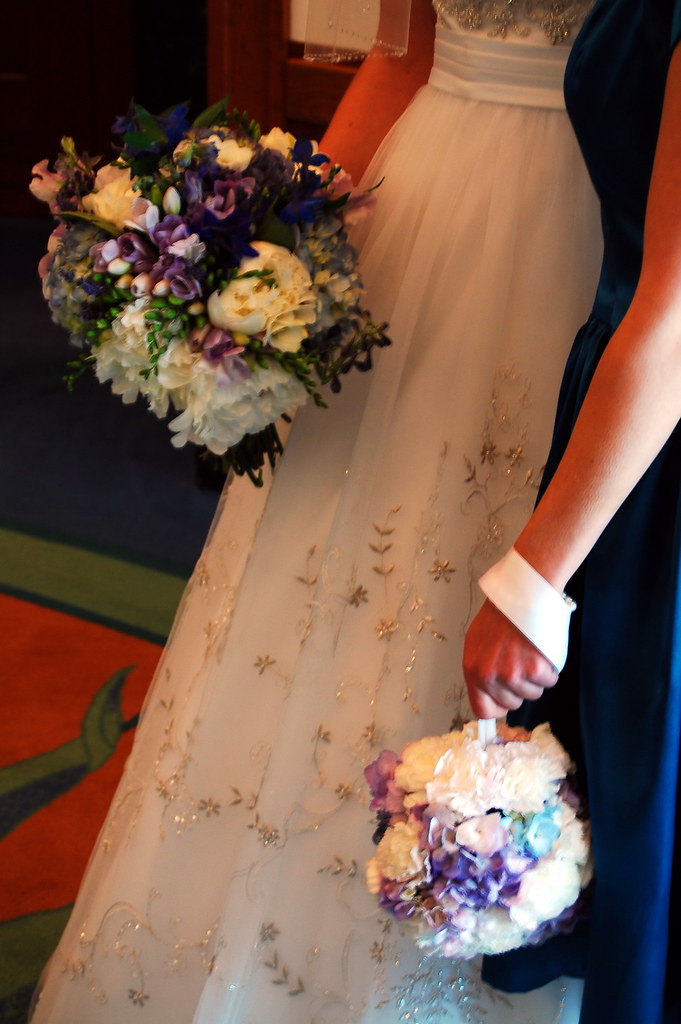
Pomanders can also be used as non-human hanging decorations. I've made them for trees and wedding arches in the past, but I especially enjoy them in place of bridesmaids bouquets.
So there you have it! Go for the premade bases. But if you can't find them, now you know what to do!
Happy flowering,
H


1 comments:
Definitely recruiting your multi-talented assistance!
Post a Comment